Difference between revisions of "Tesla Giraffe"
(→Installing the Giraffe) |
m |
||
| Line 1: | Line 1: | ||
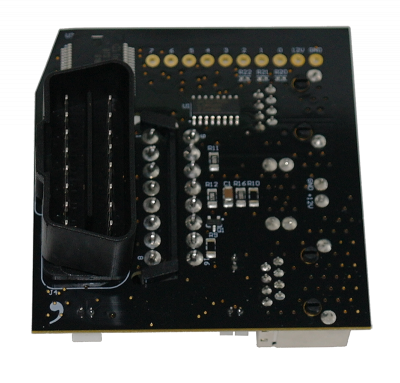
| + | [[File:Giraffe back side.png|400px|frameless|right|Back side with the OBD II connector that goes into the car]] | ||
== Installing the Giraffe == | == Installing the Giraffe == | ||
[[File:CH_bus-2.jpg|150px|thumb|right|Has 1&9]][[File:no_CH_bus-2.jpg|150px|thumb|right|Missing 1&9]]There are currently three options concerning Giraffes for your Model S. You can even make your own [[Tesla Giraffe]]. | [[File:CH_bus-2.jpg|150px|thumb|right|Has 1&9]][[File:no_CH_bus-2.jpg|150px|thumb|right|Missing 1&9]]There are currently three options concerning Giraffes for your Model S. You can even make your own [[Tesla Giraffe]]. | ||
Revision as of 02:03, 12 June 2020
Contents
Installing the Giraffe
There are currently three options concerning Giraffes for your Model S. You can even make your own Tesla Giraffe.
- An EPAS harness from Flyboy222pa on eBay
- The harness installs below the MCU.
- This path doesn't require a Giraffe and has our EPAS Harness already built-in, so you don't need to make it yourself.
- But this will require a 120 Ohm resistor if you want to install a Radar retrofit.
- Giraffe rev B from @E=mc2#7596 on the Comma.ai Discord
- This Giraffe installs into the OBD port under the dash in the driver's footwell.
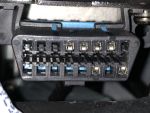
- This will work as long as your OBD port pins 1 and 9 look like the first picture on the right.
- Giraffe for cars built before May 31, 2013, will need a "TDC Connector".
- This Giraffe installs into the OBD port under the dash in the driver's footwell but needs an additional connection to the port under the MCU.
- You'll want this variant if your OBD port is missing pins 1 and 9 like the second picture to the right.
Your Comma.ai Panda plugs right into your Giraffe or Flyboy's EPAS harness. In case of the Giraffe, your need to make the EPAS Harness yourself.
Giraffe revB
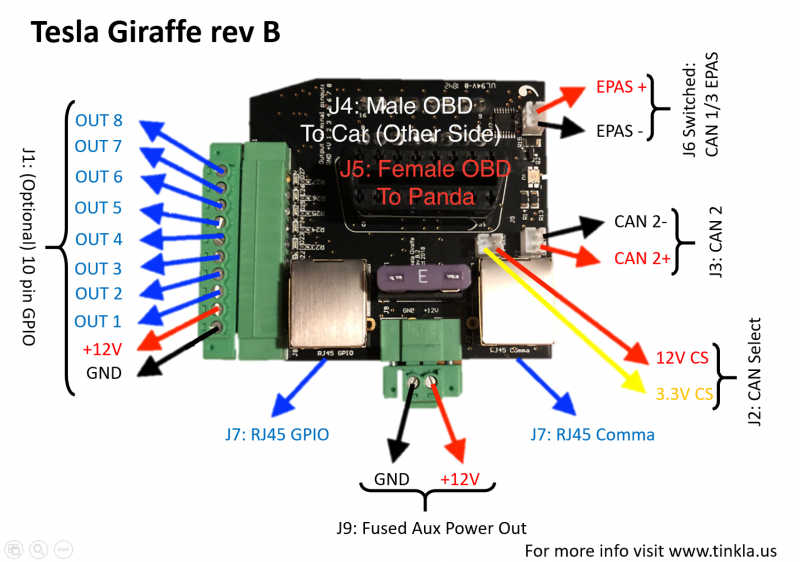
The Tesla Giraffe rev. B was created and sold by @appleguru.
On top of creating the right pin connections between Panda and the appropriate Tesla CAN Bus, it has a number of other nice features:
- automatically connects EPAS connector back to Chassis CAN bus when no Panda is present
- offers connector for CAN2 on Panda which is used for Tesla Bosch Radar
- has 12V power out which can be used to power the Tesla Bosch Radar via relay
- has the Comma RJ45 FakeEthernet CAN connector to connect the Comma Pedal
- has 8 GPIO outputs that can be used to drive certain other accessories; the 8th GPIO is used in our Panda firmware for "ignition power" which can be used to drive the relay needed for Tesla Bosch Radar power
Default Output Mapping with Tesla Giraffe rev. B firmware from my branch
The general purpose outputs on the GPIO RJ45 and optional 10 position terminal block are driven from the panda via one of the otherwise unused LIN bus outputs. This output, through the circuitry on the rev. B giraffe, drives an automotive grade 8 ch smart FET (Infineon BTS4880R) that can handle loads up to 500mA per channel (2A max across all outputs).
The initial application for the GPIO is to support the "Tesla Camera switcher" project, which allows intelligent switching between the car's backup camera and a new camera added to the front bumper to help with forward parking on a Model S or Model X. The current firmware automatically switches to the backup camera feed when in reverse, and the front camera feed otherwise, allowing for the use of pressing and holding on the menu button on the steering wheel to manually select.
Other projects that will potentially use this GPIO are the "Tesla 360 camera install", the "Tesla lighted appliqué", and a few owners that have installed light bars/want to drive relays from CAN so they come on with their high beams. The firmware is open-source, so you can configure this interface to suit your project’s needs and get a very capable GPIO from CAN! Please see the table below for the current CAN signals mapped:
| Output PIN Number | Function |
| OUT1 | Front Camera Switch (High when car is in Reverse or menu button override is active) |
| OUT2 | Drive |
| OUT3 | Brake Lights |
| OUT4 | Left Turn Signal |
| OUT5 | Right Turn Signal |
| OUT6 | Reverse |
| OUT7 | High Beams On |
| OUT8 | "Ignition" Power |
J8 RJ45 GPIO Pinout
| RJ45 Pin Number / 568B Color | Function |
| 1 / Orange/White | OUT3 |
| 2 / Orange | OUT1 |
| 3 / Green / White | OUT4 |
| 4 / Blue | OUT2 |
| 5 / Blue/White | OUT5 |
| 6 / Green | OUT6 |
| 7 / Brown/White | Fused +12V |
| 8 / Brown (and Shield) | GND |
J7 RJ45 Comma Pinout
| RJ45 Pin Number / 568B Color | Function |
| 1 / Orange/White (and Shield) | GND |
| 2 / Orange | Fused +12V |
| 3 / Green / White | EPAS CAN - |
| 4 / Blue | No Connection |
| 5 / Blue/White | GND |
| 6 / Green | EPAS CAN+ |
| 7 / Brown/White | CAN2+ |
| 8 / Brown | CAN2- |
Giraffe CAN Bus Inputs/Outputs
Panda CAN2 is used in my branch to connect the Tesla Bosch Radar. R11 on the bottom of the board is unpopulated and available for an optional 120 Ohm 1206 termination resistor to be installed if needed. CAN2 is broken out on both the Comma RJ45 output and the J3 2pin output (see pinout). If you're not planning to install the R11, please make sure you add an 120 Ohm resistor before the JST connector per the Tesla Bosch Radar instructions.
Panda CAN1 is connected to the Model S and Model X’s Chassis CAN via the giraffe’s male OBD’s Pins 1 (CH+) and 9 (CH-). The J6 EPAS output switches between CH CAN from the Car and CAN3 from the Panda, depending on the state of CAN Select (Which is driven by the panda’s GMLAN output). When it is high (D1 Yellow), J6 is sending Panda CAN3 out. When it is low (D1 Green), the Car’s Chassis CAN is going out J6.
Tesla Giraffe rev B Useful Part Numbers
2pin connectors for J2 / J3 / J6 are JST 2pos 2mm PH headers, PN B2B-PH-K-S(LF)(SN)
Fuse F1 is a standard 3A blade type automotive fuse. OE fuse is a Littlefuse 0287003.PXCN
J1 (Optional) is Phoenix contact Part number 1827787 (plug) and 1827949 (soldered header) in case you misplace your plug or would like to add your own header.
J9 is Phoenix Contact plug 1827703 in case you misplace yours.


