Pedal Interceptor
The Comma Pedal is used to provide advanced acceleration and regen braking capability on Tesla cars running Openpilot that do not have iBooster installed.
Without electric brakes (iBooster) the car only uses regenerative braking. This is not enough for sudden slowdowns. YOU MUST BE READY TO MANUALLY BRAKE AT ANY MOMENT.
Contents
What it Does
The Comma Pedal is an accelerator pedal interceptor. It is a device that is inserted between a car's electronic accelerator pedal and the DU (Drive Unit). It detects the voltage from the accelerator pedal which represents the pedal's position. It then writes that same voltage back out to the DU as if the accelerator pedal had produced it.
The Comma Pedal has 4 main systems:
- 2 Analog to Digital Convertors
- This is used to read the voltage from the car's accelerator pedal into the Comma Pedal's processor. The accelerator pedal produces an output Voltage between 0 and 5 Volts.
- 2 Digital to Analog Convertors
- This is used to send voltage back to the car's DU as if the accelerator pedal had produced it.
- 1 CAN Bus
- The CAN Bus is the car's communication network. The Comma Pedal communicates with Openpilot using the CAN Bus. It connects to the Tesla Giraffe on CAN3.
- 1 USB
- This is used to program and monitor the Comma Pedal, itself.
When Openpilot is NOT engaged, the Comma Pedal reads the voltage from the accelerator pedal and just passes it along to the DU.
When Openpilot IS engaged with longitudinal control, it gets the virtual accelerator pedal position from Openpilot and passes it on to the DU.
The Comma Pedal is also constantly sending the physical accelerator pedal's position to the CAN bus for Openpilot to read. This way you can increase speed temporarily without having to adjust max speed or disengage longitudinal control.
Obtaining a Comma Pedal
You cannot buy a pre-built Comma Pedal from Comma. Fortunately there are other people in the community manufacturing and selling them:
- http://wocsor.com/buy-a-pedal/ (sold by wocsor#0313)
- https://develolab.com/products/prod_FSN6fKevhpGWE2 (sold by Chase#7213)
Since they're currently always sold out as soon as new ones get in stock, you could also build it yourself (not recommended) or have one fabricated through a service like Macrofab.
Wiring a Tesla Pedal
In order to create your Tesla Pedal you need:
- 1x Comma Pedal board (for sources see above section)
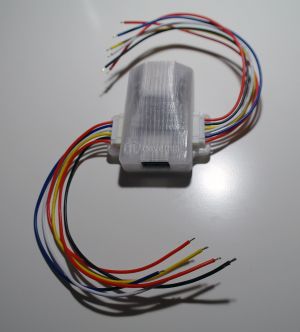
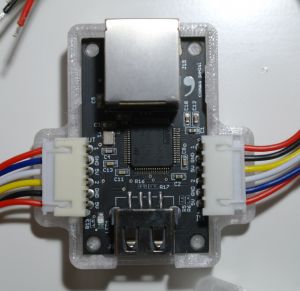
- 1x box to hold the board if your Pedal doesn't already have a case (current ones ship with 3D printed cases). You will need to cut some small openings on the sides (and in front of the RJ45) if you use this one.
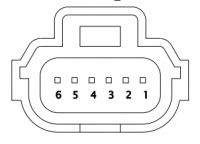
- 1x set of "WPT-929" connectors (actually Molex) - fast shipping, slow shipping
- ~3ft of wire for the connectors in case your Pedal and connectors don't come with them (~AWG24)
- 1x SN-28B crimping tool (same one as used for EPAS cable - fast shipping, slow shipping)
- EITHER 1x ethernet cable ~2ft (not crossover) for current gen Pedal and Tesla Giraffe (rev B) which have RJ45 ports
- OR 1x JST2 male and 1x female connector plus some twisted pair wire if RJ45 is not present. You can buy this and cut it and you're done (not twisted but will work just fine)
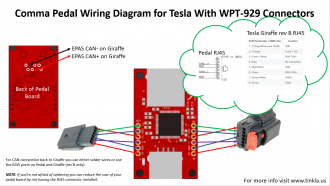
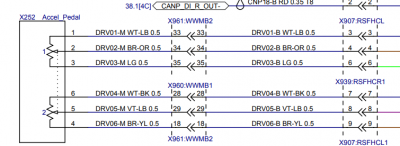
Use the diagram to connect the female WPT-929 pedal connector to the IN side of the pedal board and the male WSP-929 connector to the OUT side of the pedal connector.
Connecting the CAN BUS from the Pedal to the Giraffe depends on your setup, as explained in the parts list above.
- Via RJ45: Plug in the ethernet cable into the RJ45 port of the Pedal and the other end into the RJ45 port of the Giraffe that is labelled with "comma".
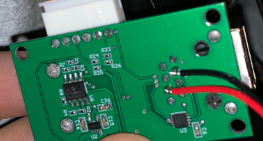
- Via JST2: Solder positions 3 and 6 of the fake-ethernet port of the Pedal board to the two JST2 connectors (male and female) with enough length to reach EPAS cable/Giraffe. We need both because you will plug the female one in the Giraffe's EPAS connector and then the EPAS Harness into the male JST2. Red should be CAN+ and black should be CAN- (that's the convention also used in the image showing the CAN wire soldered to pins 3 and 6 of the fake ethernet port on the Pedal board).
Installing the Tesla Pedal
To install the Pedal, there are two steps:
- connecting the board to the accelerator pedal
- connecting the board to the Tesla Giraffe
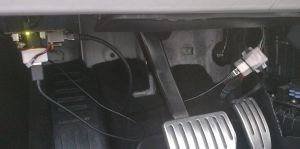
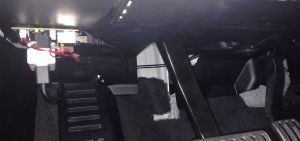
This video for a similar product shows you what you have to do in order to install the Pedal interceptor between the accelerator pedal and the car's existing connector. Take your time and watch the video first. The process is not complicated if you just follow it step by step.
Once that is complete, connect your ethernet cable to the Pedal and the Giraffe's "comma" labelled RJ45 Port. Older Giraffes and Pedals without RJ45 ports connect over JST2: Disconnect the EPAS cable from the Tesla Giraffe and connect the female JST2 from your Pedal to the Giraffe. Then connect the EPAS cable to the male JST2 from your Pedal.
If your Pedal needs to be flashed, don't put your trim back on just yet. Instead connect the Giraffe and Panda to the car and and follow instructions below. This makes it easier to get to the Pedal in case necessary.
Once you're ready to cover everything up, make sure you don't forget to reconnect the footwell LED and that all your cables are positioned well, so that they don't rub against sharp edges and that there's no tension on them.
Flashing the firmware for Tesla Pedal
You have to use a Tesla specific firmware on the Pedal in order to work for Tesla.
You can flash the Pedal directly from the EON, this is why we highly recommend installing the Pedal in your car before flashing (see section above). If, for whatever reason, you need to flash your Pedal outside the car, use below instructions in conjunction with this guide by @jfrux
Using the Tesla Pedal
Without electric brakes (iBooster) the car only uses regenerative braking. This is not enough for suddent slowdowns. YOU MUST BE READY TO MANUALLY BRAKE AT ANY MOMENT.
Out of the box, OP will use the Tesla CC (with stalk spamming) to control CC. This in our OP implementation is called Adaptive Cruise Control or ACC. CC on Tesla only works above 18 MPH (29 km/h).
If you turn off the Tesla CC by pressing on the CC stalk, OP will switch to Tesla Pedal mode (PCC). This will provide you with smooth adaptive cruise control by sending the right commands to your Tesla Pedal. Tesla Pedal works down to 1 MPH, but be careful, regen brakes stop working at 5 MPH (8 km/h).
Once you get used to it and you don't care about ACC anymore, you can set force_pedal_over_cc = True in the config file to always use Pedal.
